Baking a pie to block ads — II
Part 2: Setting up the raspberry pi, configuring Wi-Fi, SSH and VNC

This is the second article in my ongoing series “Baking a pie to block ads” where I’m documenting my ad-blocking shenanigans using a home server setup on a raspberry pi.
You can read the first part here, which is an introduction and talks about the capabilities of the pi, the fundamentals of servers and DNS based ad-blocking.
Where can I get this marvelous device?
There are loads of websites where you can place an order for any of the Raspberry Pi models. There are 9 different Pi boards and 3 different official kits on raspberrypi.org, which is the official website owned and operated by the Raspberry Pi Foundation, a UK-based charity.
You can browse the selection of products here and click on “Buy Now” for the board you want to buy. This is a great post which you can read if you want a detailed comparison between different boards.
From this page, you can select your country and the model you want to buy and it will give you a list of official reseller websites and stores you can buy it from. I will be using the Raspberry Pi 4 B (4GB) which I bought from robu.in (India) but all the instructions should work for any model of the Pi.
If you are using one of the first Pis (or Zero), you might have to pitch in for a couple of external modules (like a Wi-Fi module) but the newer ones (3 and above) have all the basic computing modules.
So I got a board, now what?

You will need to get a few things before you start. If you have been tinkering with stuff, you might have most of these things lying around but if not, you will need to somehow procure these. You can buy them separately or get an all-in-one kit which contains everything. This is the complete list of things:
- 5V, 3A, 15 W power supply:
This specification is for the Pi 4, Model B, please make sure you check the power requirements for the board you are going for. This model has a USB C based power input. Please make sure you buy and use a good quality, genuine power supply unit because a bad one might damage the Pi or the storage devices. - A micro SD card and a card reader:
I’ll be using a 32GB SanDisk MicroSD card (purchased from Amazon). Again, please make sure you are using a genuine, good quality card because this will be the primary storage device which also stores the OS. - Display, keyboard and mouse (all optional): These are the peripherals which are required for the first time setup and are not needed if you are using a Pi only as a server. But if you are planning to use it as a full fledged desktop, it’s better to invest in a good monitor (with an HDMI port), keyboard and mouse.
These are optional because you can do a headless setup (installation and configuration without an additional display or input devices) for a Raspberry Pi where you will just need a secondary PC/laptop which is what I’ll be doing here.
But, I’ll also add a section for the regular setup process in case you want to take that route (it’s easier but more cumbersome because of all the peripherals involved).
Excellent! Now you are ready to follow the steps below to setup your Pi!
Step 1: Prepare the micro SD card
For installing the OS, you will need:
- The micro SD card (obviously!)
- Micro SD card reader
- An image utility to “write” the OS on to the micro SD card in a manner which can be recognized by the Pi
The first 2 things are pretty straightforward, and as for the image utility, there are plenty of free and open source options available on the internet, but I will be using the official Raspberry Pi imager (can’t go wrong with that) which is available for Windows, Mac OS and Linux. It can be downloaded from here.
Follow the steps below to install the OS:
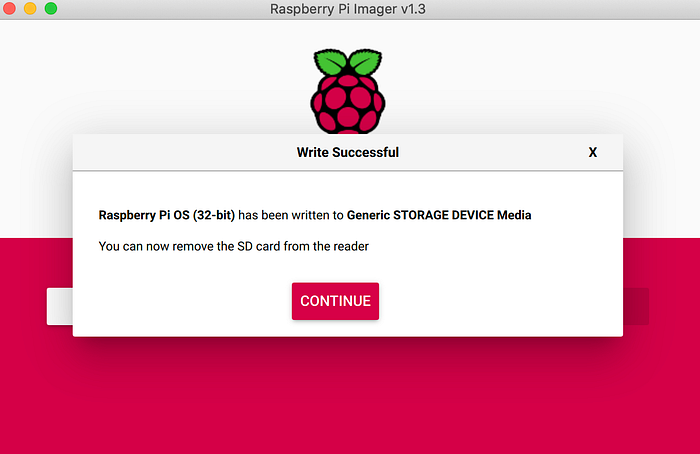
- Once you’ve downloaded the image utility, insert the micro SD card in the reader and connect it with your PC (which has the imager) and run Raspberry Pi Imager and you should see the following screen:
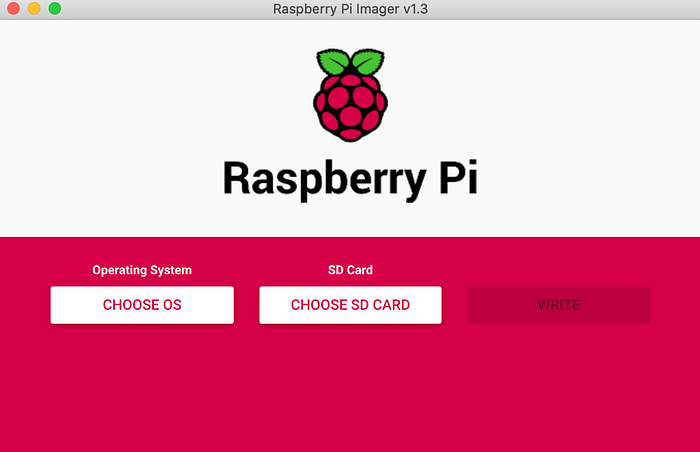
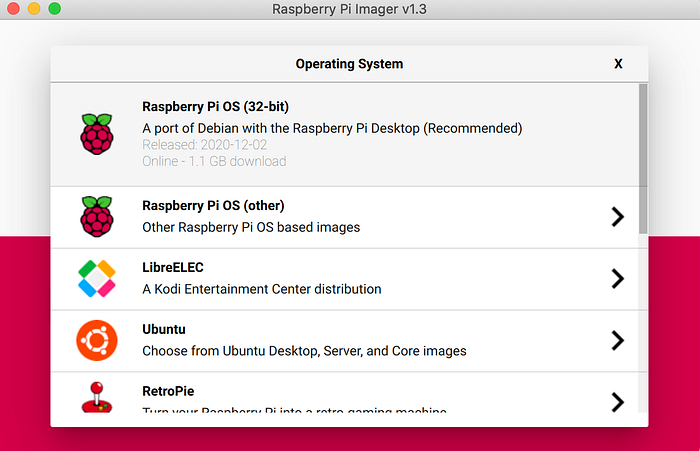
- Click on “Choose OS” and select the OS you want to run on your Pi. I’m going with the recommended Raspberry Pi OS 32-bit, but you can choose any of the other options or even any pre-downloaded OS image you might have
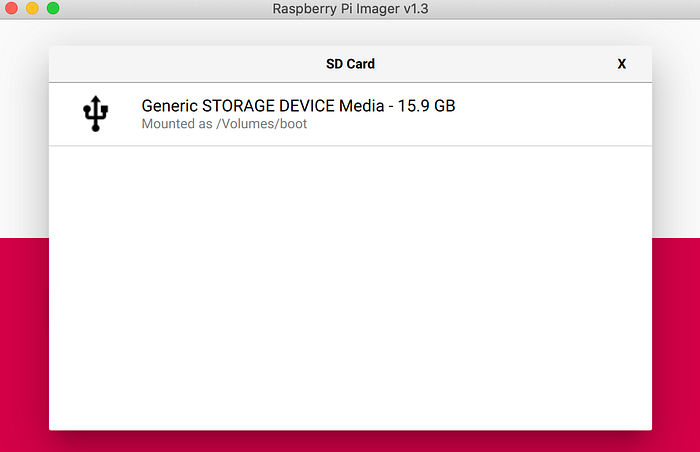
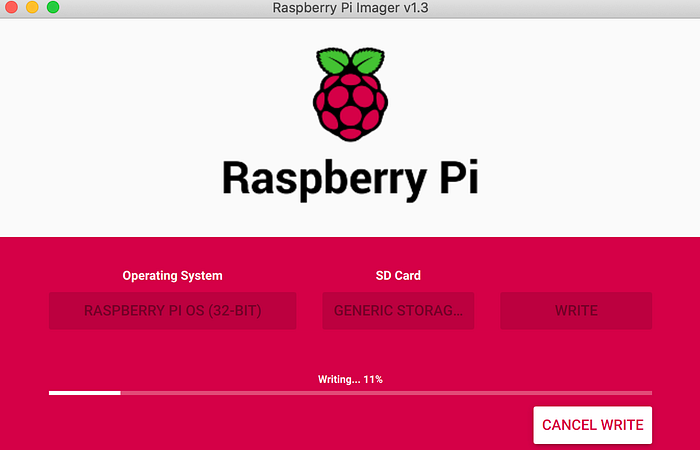
- Once you’ve selected the OS, click on “Choose SD Card” and select the card you want to write to and click “Write”
- Grab a drink, some snacks or take a bathroom break. This will take a few minutes(for writing and verifying).
- Once done, click on “Continue”, eject and insert the card again as we need to add some files to it before we put it in the Pi.
As we are doing a headless setup, we will have the following challenges:
- No display to show what the startup process looks like
- No startup screen or desktop where we can point, click and type to configure the Pi
- No way to do a first time setup graphically
Steps 3–5 are for fixing these issues. If you’ve connected the Pi using an external display, you don’t need to worry about these and you can move on to step 6.
Step 3: Setting up Wi-Fi configuration
So no display means we cannot go to network settings and connect to WiFi; so to fix this, we will add a configuration file to the SD card which you prepared in the previous step.
Put the following lines in the file:
ctrl_interface=DIR=/var/run/wpa_supplicant GROUP=netdev
update_config=1
country=<Insert 2 letter ISO 3166-1 country code here>network={
 ssid="<Name of your wireless LAN>"
 psk="<Password for your wireless LAN>"
}
You can get the ISO country code from this Wikipedia page.
Name the file as “wpa_supplicant.conf” and save it in the “boot” section of the SD card (the drive will be named as “boot”)
Now insert the card in the Pi, connect the power supply and switch it on and wait for about 5 minutes for it to boot, discover and connect to the Wi-Fi network mentioned in the file.
Step 4: Getting the IP address
Every device connected to a Local Area Network (your home network in this case) is assigned an IP address and in order to access your Pi remotely using SSH or VNC (explained in the next step), you need to know the Pi’s IP address.
If you’re using the Pi with a display, simply run the following command to get your Pi’s IP address:
hostname -IFor our use case (headless Pi), the following steps will give you the IP address :
- In a web browser, navigate to your router’s IP address which is usually http://192.168.1.1 . If not, you can google your router’s default login page.
- Login using your credentials (usually printed on the router or given to you during the installation)
- Browse the list of connected devices (or any similar menu) and you should see some devices you recognize (your phone, PC etc.)
- Locate your Pi in the list and note down the IP address.
For this tutorial, let’s assume the IP address is 192.168.1.114
Step 5: Setting up SSH & VNC
Now the Pi can connect to Wi-Fi but there are a couple more steps we need to follow before we can access it from some other device on the same network and those are:
SSH: Secure Socket Shell (SSH) is basically a network protocol to securely access a computer over an unsecured network. You can read more about SSH here.
For us common folk who are not managing any big production servers, it has 1 main benefit apart from security; it’s probably the best way to control, manage and update systems and services of a server, remotely, and without having to connect it to a dedicated display or input device(s).
I can comfortably access my Pi server from my Macbook with just a power supply connected to the Pi (after configuring it a bit, of course).
SSH configuration:
This is super simple! Just 3 steps:
- Create an empty file
- Name it “ssh” (no extension like .txt or .exe etc.)
- Copy and paste it to the boot section of the SD card (same as step 3)
That’s it, not even kidding! SSH is now enabled and you didn’t even put the card in the Pi yet!
Actually, you should do that now; eject the card from the reader, and insert it into your Pi and connect the power supply.
Connecting to the Pi using SSH:
- Open up the terminal (Mac OS/Linux) or PuTTY / Linux shell in Windows
- Type the following command (here “pi” is the default user and the IP is the one we noted down in step4)
ssh pi@192.168.1.114- You will get the following prompt, type “yes”
The authenticity of host '<IP>' can't be established.
ECDSA key fingerprint is SHA256:.....(random string).
Are you sure you want to continue connecting (yes/no/[fingerprint])?- Enter the password for the user “pi”, which is “raspberry” and you’re now logged in to your Raspberry Pi via SSH!
VNC: Sometimes you might want to work on the Pi from another device remotely. VNC (Virtual Network Computing) is a graphical desktop sharing system that allows you to remotely control the desktop interface of one computer (running VNC Server) from another computer or mobile device (running VNC Viewer). VNC Viewer transmits the keyboard and either mouse or touch events to VNC Server, and receives updates to the screen in return. You can read more about VNC here.
VNC configuration:
There are a lot of options for VNC server and client services but we we will be using VNC Connect from RealVNC (which is included by default with Raspberry Pi OS).
To enable and configure VNC, we will first need to make sure we have logged in using SSH. Once you’re logged in, follow the steps given below:
- Enter the following command:
sudo raspi-config- Enter the password (“raspberry” for now) and you should see the following screen

- Navigate to “Interface Options” using the arrow keys and press Enter and you should see the following:

- Navigate to P3 (VNC) and press Enter when you see the following prompt:

- Press Enter when you get the final prompt saying “The VNC server is enabled”
- Now you’ll be redirected to the main screen and we need to select the resolution. Navigate to “Display Options” (number 2),press Enter and press Enter on “D1 Resolution” and you should get the following prompt:
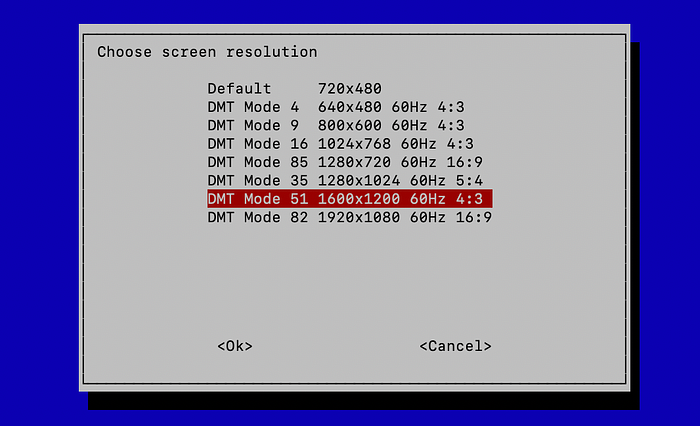
- Select the resolution you want (I have selected 1600x1200) and press Enter and press Enter again when it says the resolution is set.
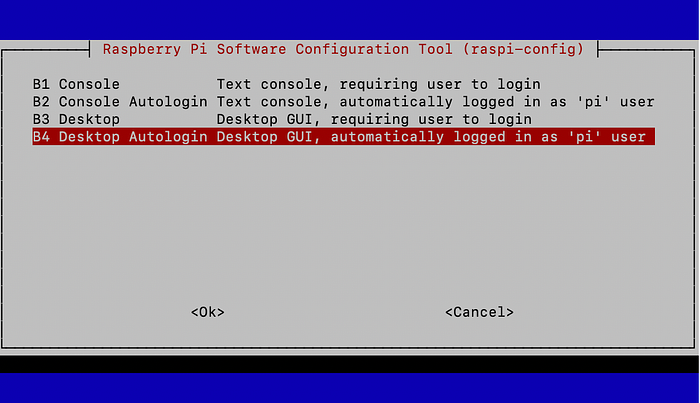
- Now for the final step, we need to tell the Pi to login to the desktop automatically, so select and enter the “System Options” (number 1) in the main screen.

- Navigate to S5 (Boot / Auto Login) and press Enter and from there, select the last option and press Enter
- Now we need to install a VNC viewer to view and control our Pi from a Macbook (or any other computer, I am doing it using a Macbook). Download the viewer from here and install it.
- Open VNC viewer once it is installed
- Click on “File” and then “New Connection”
- In the field “VNC Server”, enter the IP address of the Pi and add a name which will act as an identifier and click “OK”
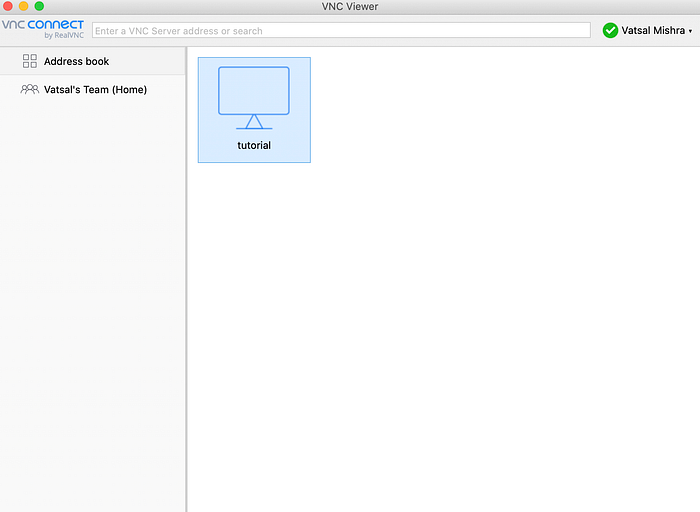
- You will now see something like this, now click on the newly added connection (named “tutorial” here) and it will show a pop up for credentials
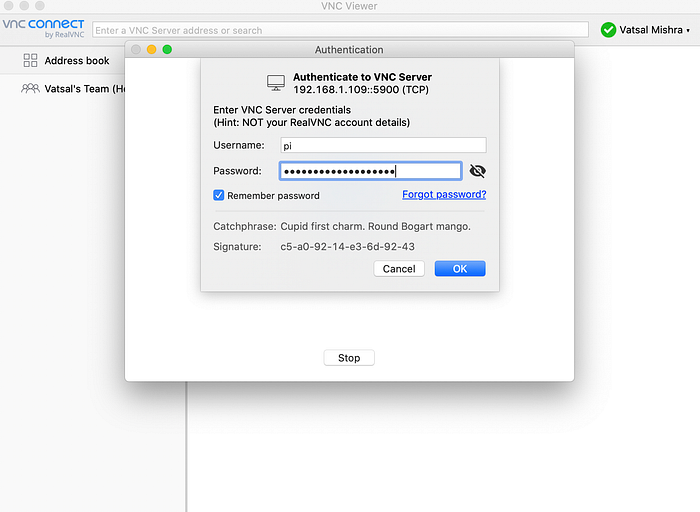
- For the username, enter “pi” and password is still “raspberry” same as before and enable the “Remember password” option and click OK and you’re logged in to your Pi remotely!
Step 5: Setting up SSH, VNC and first time setup on the Raspberry Pi with a monitor and input devices
- Once the micro SD card is setup (step 2), insert it into the slot in the Pi, connect the monitor and USB based input devices, power supply and switch it on
- You’ll see some boot up processes and once done, you will see something like this:
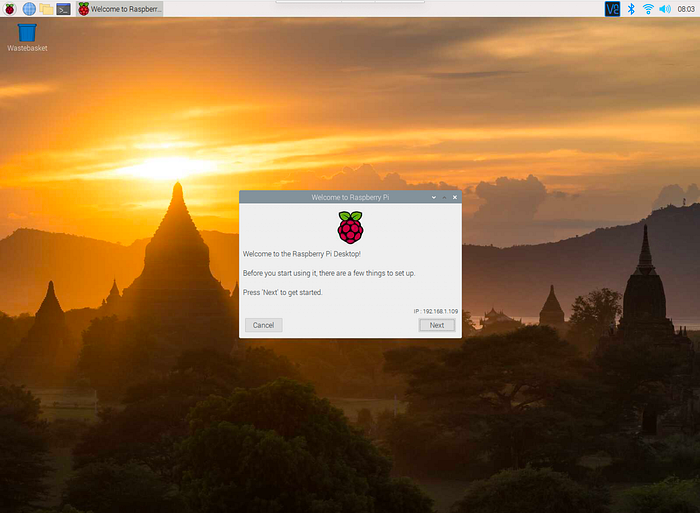
- Clicking on “Next” will take you to the locale setting where you will specify your country, timezone and language as follows:
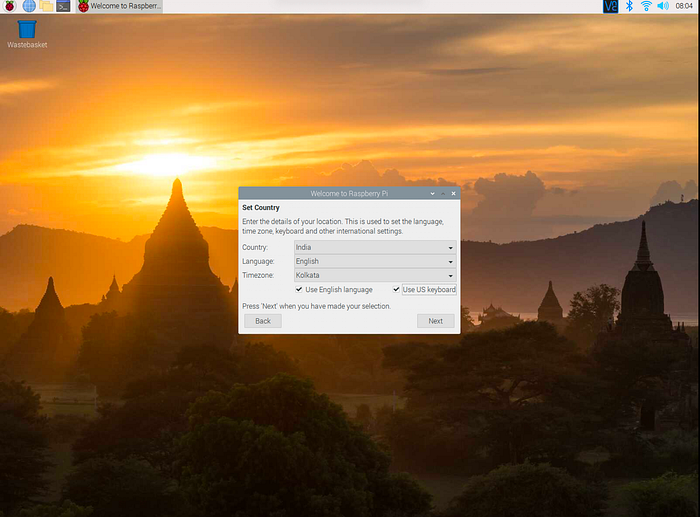
- Once done, click on “Next” and set a new password and click “Next” again and you will see the following screen where you can check the box if you see a black border around the screen and the Pi will optimize it after the next reboot

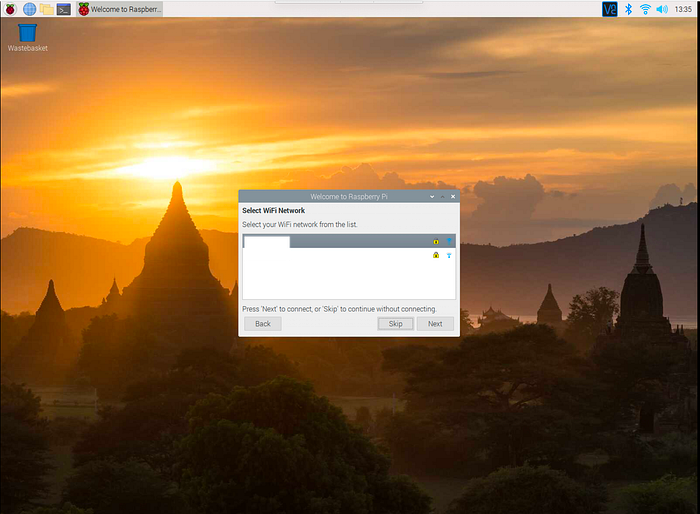
- Click next to select and connect to your home Wi-Fi:
- Click “Next”, update the software and finally you’ll be presented with this prompt where you will restart the Pi:

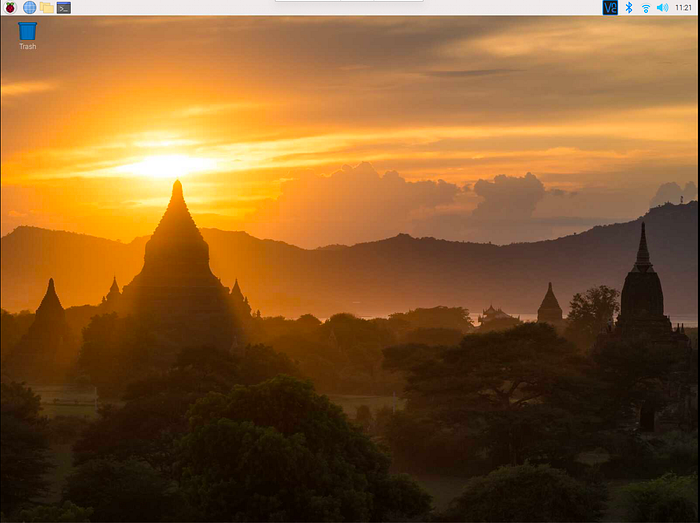
- Aaand you’re done!! That’s it!
Step 6: Mess around and get to know your brand new Raspberry Pi computer!
Browse the web, watch some cat videos, try your hand at programming, explore all the different apps bundled with Raspberry Pi OS. Basically just use it how you would use your regular PC and see how you like it.
For the next part, we will be finally getting into making our ad-block server from this Pi, stay tuned!
And as always, constructive feedback and questions are welcome :)